India’s toughest trek: the ultimate challenge for adventure seekers
 Oct, 15 2025
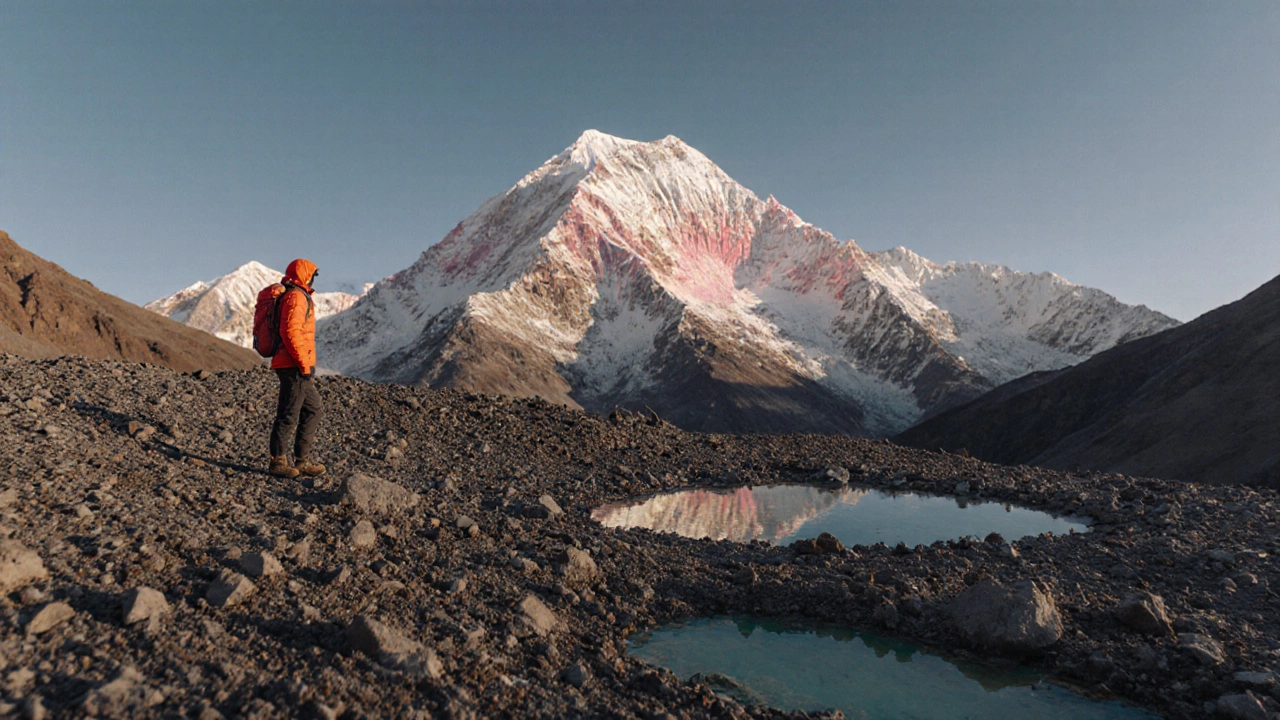
If you’ve ever wondered which trail in India tests every ounce of stamina, skill and mental grit, the answer points straight to the high‑altitude deserts of Ladakh. The toughest trek India is widely regarded as the StokKangri trek - a three‑day climb that pushes you above 6,100m (20,000ft), forces rapid acclimatization and demands solid mountaineering basics.
The StokKangri Trek: Why it earns the title of the toughest trek in India
Stok Kangri is a 6,153‑meter peak in the Ladakh the high‑altitude desert region in northern India, part of the greater Indian Himalayas. While the summit itself is a technical climb, most trekkers aim for the “StokKangri Base Camp” trek, which still requires crossing glaciated terrain, steep scree slopes and exposure to extreme weather.
- Altitude: Ascending past 5,500m triggers rapid onset of altitude sickness if you’re not properly acclimatized.
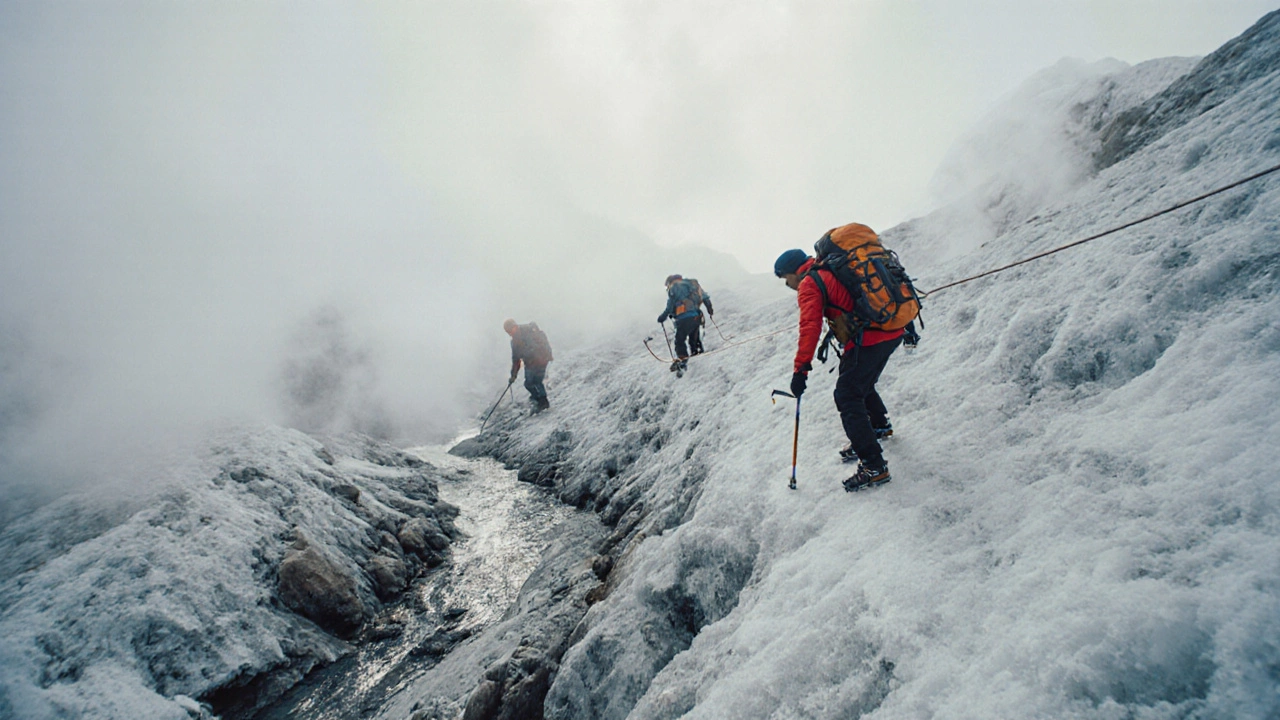
- Terrain: Loose gravel, icy snowfields and occasional crevasses demand crampons and an ice axe even for a “trekking” route.
- Weather: Day‑time temperatures swing from 0°C to -15°C, and sudden storms can drop visibility to near zero.
- Logistics: Permits, limited rescue options and remote desert conditions add a layer of complexity many other Indian treks lack.
These factors combine to make StokKangri the most demanding standard trekking itinerary across the Indian subcontinent.
When to attempt the toughest trek in India
The window for a safe ascent is narrow. The best months are June to early September, when the monsoon stays south of the Himalayas and the high passes are mostly clear. Late June offers the most stable weather, while early September begins to see sporadic snowfall on the higher sections.
Attempting the trek outside this window skyrockets the risk of avalanches, road closures on the Leh‑Srinagar highway and the need for winter gear that many trekkers don’t own.
Preparing for a high‑altitude adventure
Success on StokKangri starts long before you step foot on the trail. Here’s a practical prep plan:
- Build aerobic base: 3-4 months of running, cycling or swimming, aiming for at least 45 minutes, three times weekly.
- Strengthen legs and core: squats, lunges, step‑ups and planks to handle steep climbs and heavy packs.
- Acclimatization hikes: spend a weekend at 3,500-4,000m (e.g., Pangong Tso area) to let your body adapt.
- Learn basic mountaineering skills: self‑arrest, crampon walking, rope handling - most local guiding agencies run a one‑day crash course.
- Get a medical check‑up: screen for heart conditions and discuss altitude‑sickness prophylaxis with a doctor.
Even with perfect preparation, altitude remains unpredictable. The ability to recognize and react to Altitude Sickness a range of symptoms caused by low oxygen levels at high elevations, including headache, nausea and severe edema can be the difference between a memorable summit and an emergency evacuation.
Essential gear checklist - what you really need
Pack light, but don’t skimp on high‑altitude essentials. Below is a concise list:
- Insulated down jacket (800fill power) - High Altitude Gear equipment designed to retain warmth at extreme elevations
- Layered base & mid layers (merino wool, fleece)
- Water‑proof trekking pants and gaiters
- Crampons and ice axe (compatible with trekking boots)
- Sturdy double‑layer trekking boots with good ankle support
- Sleeping bag rated -15°C, sleeping pad, bivy sack
- Solar charger, power bank, headlamp with extra batteries
- Sunscreen SPF50+, lip balm, sunglasses with UV protection
- Personal first‑aid kit, altitude sickness medication (acetazolamide), water‑purification tablets
Day‑by‑day itinerary for the StokKangri Base Camp trek
The classic route is a 70‑km loop, usually completed in 3 days with a support team. Below is a concise breakdown:
| Day | Base | Distance (km) | Elevation Gain (m) | Key Activities |
|---|---|---|---|---|
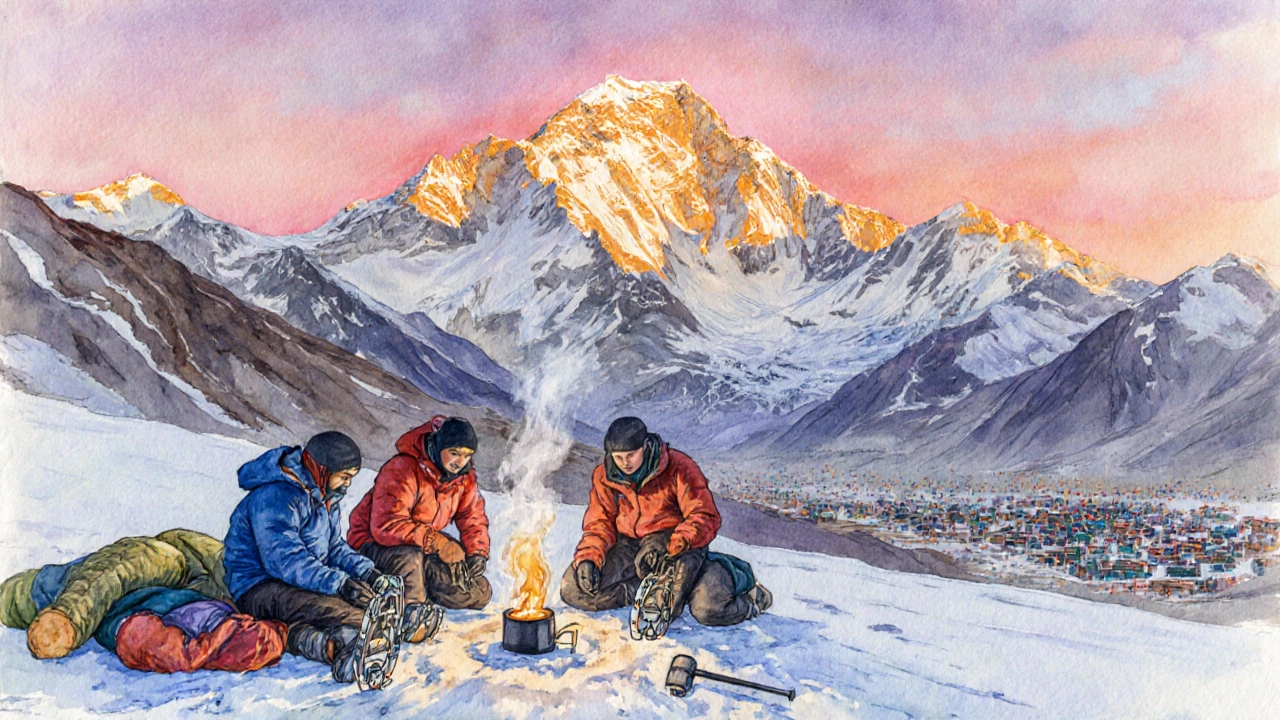
| 1 | Leh (3,500m) | 10 | 400 | Drive to Stok, short acclimatization hike to Stok Village, overnight at tea‑house. |
| 2 | Stok Village (3,900m) | 18 | 1,200 | Ascent to Camp1 (4,600m) via frozen stream, set up tents, monitor for altitude symptoms. |
| 3 | Camp1 (4,600m) | 12 | 1,500 | Early start, push to Camp2 (5,400m) on snow‑covered scree, optional summit push for experienced climbers. |
| 4 | Camp2 (5,400m) | 6 | 0 | Descent to Stok Village, return to Leh, de‑brief and celebrate. |
Most trekking agencies include a local Guide Service professional guides familiar with the terrain, weather patterns and emergency protocols in Ladakh that handles permits, meals and equipment transport.
Permits, costs and local support
StokKangri lies in a protected area, so a Trekking Permit official authorization required by the Indian government to enter certain high‑altitude zones is mandatory. The fee is modest (≈INR300 per person) but must be obtained in Leh or through a licensed agency.
Typical package pricing (2025 rates) for a four‑day trek with guide, porter, meals and equipment is:
- Solo traveler: INR12,500-15,000
- Couple sharing a tent: INR22,000-24,000
- Indian nationals (discounted): INR9,500-11,000
These costs cover oxygen bottles (optional but recommended above 5,400m), emergency evacuation insurance and a basic medical kit.
Safety tips and common pitfalls
Even seasoned trekkers can fall into traps on the toughest trek in India. Keep these pointers top of mind:
- Acclimatize early. Spend at least two nights above 3,500m before attempting Camp2.
- Never ignore headache or dizziness - descend immediately if symptoms worsen.
- Carry a spare battery for your headlamp; darkness falls quickly at altitude.
- Stay hydrated - melt snow or use a portable water filter; dehydration speeds up altitude sickness.
- Check the weather forecast each morning; a sudden wind shift can make a slope treacherous.
Most emergencies are resolved by the local guide’s knowledge of safe shelters and the nearest rescue helicopter base in Leh. Nevertheless, personal responsibility and preparedness remain the first line of defense.
How StokKangri stacks up against other Indian high‑altitude treks
For perspective, here’s a quick table comparing StokKangri with three other famously tough routes.
| Trek | Max Altitude (m) | Typical Duration | Permit Required | Difficulty (1‑5) |
|---|---|---|---|---|
| StokKangri Base Camp | 6,153 | 4days | Yes (Trekking Permit) | 4 |
| KalindiKhal (Himachal Pradesh) | 5,550 | 7‑10days | Yes (Restricted Area Permit) | 5 |
| Chadar (Zanskar River) Trek | 3,800 | 7‑9days | Yes (Restricted Area Permit) | 3 |
| Kangchenjunga Base Camp (Sikkim) | 5,300 | 7‑8days | Yes (Restricted Area Permit) | 4 |
While KalindiKhal technically scores a higher difficulty rating (5), its lower altitude and seasonal river crossing make it less lethal than the rapid ascent and thin air of StokKangri. This balance of altitude, terrain and logistics cements StokKangri as the toughest *standard* trek for most adventurers.
Next steps - planning your ultimate challenge
Ready to test yourself on India’s toughest trek? Follow this simple roadmap:
- Pick a reputable local operator in Leh - read recent reviews and confirm they include permits and emergency insurance.
- Set a training calendar: 12 weeks of cardio + strength, plus two weekend high‑altitude hikes.
- Order gear early (late winter sales) and schedule a gear‑check session with your guide.
- Book your trip for early July 2025 to enjoy stable weather and avoid peak tourist crowds.
- Complete a medical clearance and pack a copy of your insurance policy in a waterproof pouch.
With the right preparation, the StokKangri trek transforms from a daunting challenge into an unforgettable triumph.
Frequently Asked Questions
What is the minimum fitness level required for StokKangri?
You should be able to comfortably hike 15km on flat terrain with a 12kg pack, and handle steep ascents of at least 600m elevation gain in a single day. Prior exposure to altitudes above 4,000m is highly recommended.
Do I need to bring my own climbing equipment?
Most agencies provide crampons, ice axes and ropes for the trek. If you own personal gear that fits well, you can bring it, but it isn’t mandatory.
Is it possible to do the trek without a guide?
Legally, a guide is required for the permit. Practically, the remote nature of the route and limited rescue options make a guide essential for safety.
How much should I budget for the whole experience?
Including permits, guide, porter, meals, basic gear rental and insurance, most solo travelers spend between INR12,500and15,000 (≈USD150‑180). Adding optional summit gear or private transport can push the total toward INR20,000.
What are the signs of severe altitude sickness I should watch for?
Look for loss of coordination (ataxia), persistent vomiting, breathlessness at rest, or a rapid heartbeat above 110bpm. If any appear, descend immediately and seek medical help.